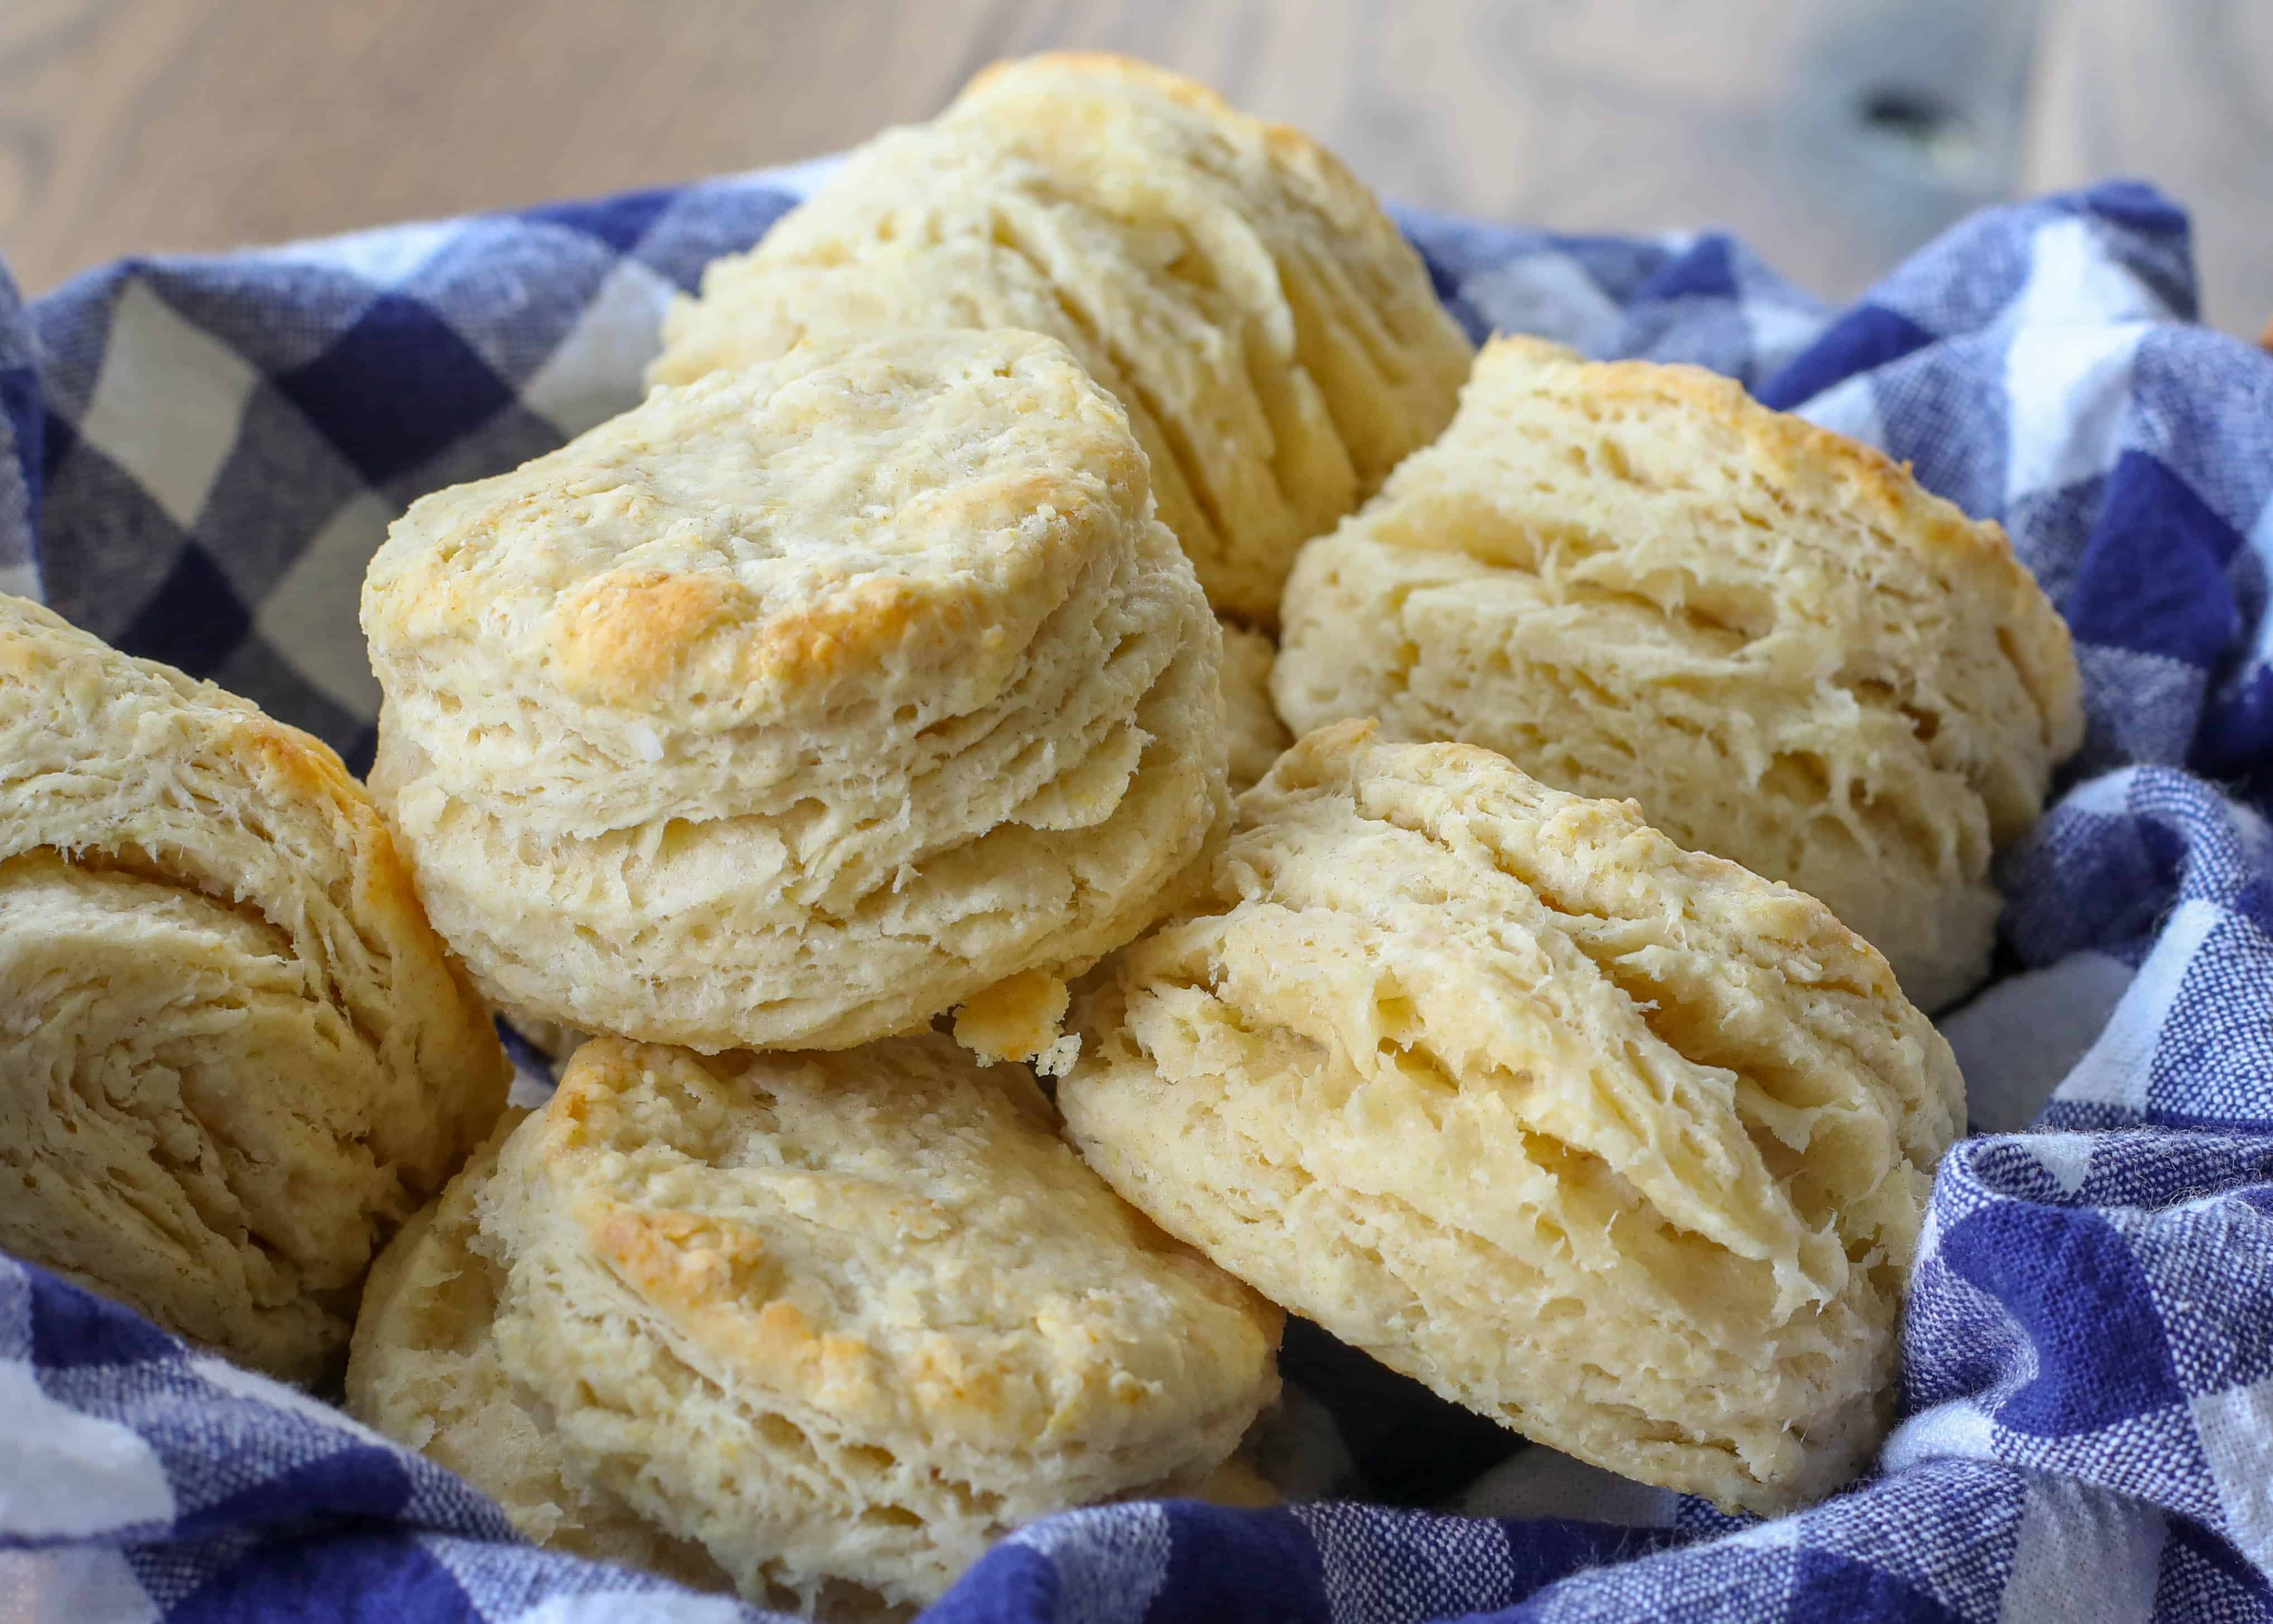
The Dream of Buttery & Fluffy Biscuits in Just 10 Minutes
Imagine biting into a biscuit so tender, so impossibly light, it practically melts in your mouth, leaving behind a rich, buttery flavor and the delightful sensation of delicate, flaky layers. For many, achieving this culinary perfection at home seems like a distant dream, often associated with complicated techniques or lengthy baking sessions. But what if we told you that the secret to these heavenly, light and fluffy reliable biscuits lies in a mere ten minutes of hands-on effort?
Yes, you read that right. In less time than it takes to brew your morning coffee, you can be well on your way to baking a batch of biscuits that will redefine your understanding of homemade goodness. This isn't just a promise; it's a proven method born from years of kitchen triumphs and learning from common biscuit blunders. Get ready to transform your breakfast, brunch, or dinner sides with biscuits that are consistently buttery, beautifully layered, and astonishingly easy to make.
From "Hockey Pucks" to Perfection: Your Journey to Reliable Biscuits
The path to perfect biscuits is often paved with good intentions and, sometimes, less-than-stellar results. Many home bakers can relate to the initial frustration, much like a certain anecdote of a newlywed's first attempt. The vision was there: happy, domestic bliss, kneading dough with enthusiasm. The reality? A half-hour of tireless kneading led to dense, unrisen, utterly inedible "hockey pucks." It’s a common tale, one that can understandably scare a budding baker away from the craft for years.
This early experience highlights a crucial lesson: the conventional wisdom of kneading for bread-making is the arch-nemesis of a truly tender biscuit. What works for a chewy loaf will absolutely kill the delicate structure of a biscuit. The revelation comes from discovering a method that defies traditional bread-making rules, focusing instead on gentle handling and specific techniques that coax the flour, fat, and liquid into forming those coveted layers.
Over two decades of refining and adapting, the journey from those early failures has led to a recipe that consistently delivers light and fluffy reliable biscuits. This isn't just about avoiding past mistakes; it's about embracing a technique that ensures every batch emerges from the oven as a melt-in-your-mouth masterpiece, equally at home drenched in gravy or simply adorned with butter and jam. For a deeper dive into overcoming common biscuit hurdles, explore how to Achieve Fluffy, Reliable Biscuits.
Unlocking the Secrets to Light and Fluffy Reliable Biscuits
The transformation from dense dough to delicate layers hinges on a few surprisingly simple, yet critical, principles. Forget everything you thought you knew about aggressive dough handling; our focus here is on finesse and understanding the science behind the perfect rise and texture.
The Magic of Real Butter for Unbeatable Flavor
While some traditional biscuit recipes rely on shortening, the undeniable truth is that real butter elevates the experience to another dimension. The rich, creamy flavor of butter permeates every bite, creating an irresistible depth that shortening simply can't replicate. Beyond taste, butter also plays a crucial role in texture. As cold butter melts in the oven, it releases steam, which creates tiny pockets within the dough, contributing significantly to the flaky, layered structure. Using high-quality, real butter is non-negotiable for truly buttery & fluffy biscuits.
Pro Tip: Always use very cold butter! Cube your butter and, if possible, even pop it into the freezer for 10-15 minutes before mixing. This ensures it stays solid longer, creating more steam pockets and thus more distinct layers during baking.
The Hands-Off Approach: Why Less is More for Tenderness
This is perhaps the most counter-intuitive, yet vital, secret to biscuit success. Unlike yeast breads that require extensive kneading to develop strong gluten networks, biscuits thrive on minimal handling. Over-kneading develops too much gluten, which results in a tough, chewy biscuit – precisely the "hockey puck" scenario we want to avoid. The goal is to bring the dough together just enough, without overworking it.
Think of biscuit dough as a delicate creature that prefers gentle encouragement over forceful manipulation. The less you handle it, the more tender your final biscuits will be. This philosophy underpins the entire 10-minute process, making it not only faster but also fundamentally better for achieving that coveted light texture.
The Art of the Fold: Creating Tender Layers Without Kneading
So, if not kneading, then what? The answer lies in a simple, elegant technique: folding. This method achieves the gentle gluten development needed for structure while simultaneously building those beautiful, tender layers. Instead of beating the dough into submission, you simply bring it together until it barely holds, then fold it over on itself several times.
Each fold creates a new layer of butter and dough. As the biscuits bake, the moisture in those butter layers turns to steam, pushing the layers apart and creating that characteristic flakiness. It's a surprisingly easy process:
- Gently bring your shaggy dough together on a lightly floured surface.
- Flatten it slightly into a rectangle.
- Fold one-third of the dough over the middle, then fold the remaining third over that (like folding a letter).
- Turn the dough 90 degrees and repeat the flattening and folding process.
Repeating this 3-4 times is usually sufficient. This technique is the cornerstone of creating Perfect Layers with The Simple Fold Method, ensuring your biscuits rise beautifully and boast an incredibly tender crumb.
The Straight Cut: A Simple Rule for Sky-High Biscuits
Once your dough is gently folded and ready, the cutting process is another critical, yet often overlooked, step. When using a biscuit cutter, resist the urge to twist! Twisting seals the edges of the biscuit dough, preventing it from rising to its full potential. Instead, press the cutter straight down through the dough with a firm, decisive motion, then pull it straight back up.
This clean cut allows the layers to expand freely upwards in the oven, resulting in taller, more majestic biscuits. A bonus tip: if you notice your biscuits rising exceptionally tall and starting to lean, a light thumbprint pressed into the top of each biscuit before baking can help keep them stable and upright.
Your 10-Minute Guide to Buttery & Fluffy Biscuits: Method Overview
Putting these secrets into practice is surprisingly quick. The "10-minute" promise refers to the hands-on mixing, folding, and cutting time, allowing you to get your biscuits into the oven with minimal fuss.
- Combine Dry Ingredients: Whisk together flour, baking powder, baking soda, and salt. These leavening agents are crucial for a good rise.
- Cut in Cold Butter: Use a pastry blender, two knives, or even your fingers (working quickly to keep butter cold) to cut the very cold butter into the dry ingredients until the mixture resembles coarse crumbs with some pea-sized pieces of butter remaining.
- Add Liquid: Pour in very cold buttermilk (or a buttermilk substitute) and mix just until the dough comes together in a shaggy mass. Do not overmix!
- Fold & Flatten: Turn the dough out onto a lightly floured surface. Gently pat it into a rectangle, perform the 3-4 folds as described above, then gently pat it to your desired thickness (typically about 1/2 to 3/4 inch).
- Cut Biscuits: Using a straight-down motion, cut out your biscuits. Re-pat and cut any scraps only once or twice, handling minimally.
- Bake: Arrange biscuits close together (or touching for softer sides) on a baking sheet and bake in a hot oven until golden brown.
This streamlined process ensures maximum flavor and texture with minimum effort, making those light and fluffy reliable biscuits a regular fixture in your kitchen.
Beyond the Basics: Expert Tips for Your Best Biscuits Yet
- Buttermilk is Your Friend: While some recipes allow for regular milk, buttermilk's acidity reacts beautifully with baking soda and powder, leading to an extra tender crumb and contributing to the tang that makes biscuits so irresistible. If you don't have buttermilk, you can make a substitute by adding 1 tablespoon of white vinegar or lemon juice to a measuring cup, then filling the rest with regular milk to equal 1 cup. Let it sit for 5 minutes before using.
- Don't Be Afraid of Heat: Biscuits love a hot oven, typically between 425°F and 450°F (220°C-230°C). The high heat helps the biscuits rise quickly and creates a beautifully golden crust.
- Space Them Out (or Not!): For crispier, individual biscuits with crusty sides, space them about an inch apart on the baking sheet. For softer, pull-apart biscuits that rise taller, arrange them so they are just touching.
- Brush with Butter: For an extra golden top and an irresistible buttery sheen, brush the tops of your biscuits with melted butter before baking, or immediately after they come out of the oven.
- Serving Suggestions: While perfect plain, consider serving your buttery & fluffy biscuits with homemade jams, honey, savory gravies (classic biscuits and gravy!), or even split and filled with eggs and cheese for a hearty breakfast sandwich.
Conclusion: Your Path to Biscuit Bliss
Gone are the days of dense, disappointing biscuits. With just a few key techniques and a mere ten minutes of hands-on work, you can consistently create light and fluffy reliable biscuits that are rich with buttery flavor and boast incredibly tender layers. The journey from "hockey pucks" to perfection is simpler than you ever imagined, relying on gentle handling, the magic of folding, and a straight cut. Embrace these secrets, and you'll find yourself reaching for this quick, dependable recipe again and again, ready to enjoy the simple, unparalleled joy of truly homemade biscuits.
