The journey from a kitchen novice to a master biscuit baker can be fraught with culinary missteps, much like the infamous "hockey puck" incident shared by many enthusiastic but misguided early attempts. Imagine spending half an hour kneading biscuit dough, believing that more effort equals better results, only to pull out flat, dense, and utterly unappetizing discs from the oven. This common rookie error, often rooted in a misunderstanding of dough dynamics, can scare even the most determined home cook away from biscuit making for years. But fear not! Achieving light and fluffy reliable biscuits isn't a mythical feat reserved for seasoned Southern grandmas. It's a surprisingly simple process built on a few fundamental, yet often overlooked, principles that transform dense dough into melt-in-your-mouth perfection.
From Culinary Calamity to Fluffy Perfection: The Biscuit Journey
Many of us have a similar story to the one recounted by a seasoned baker who, as a newlywed, committed the cardinal sin of biscuit making: over-kneading. Forgetting that biscuits are a "quick bread," designed for minimal handling, she unknowingly developed the gluten in her dough to an extreme, resulting in an unyielding texture akin to its namesake hockey puck. This isn't just a personal anecdote; it's a critical lesson in biscuit science.
- The Over-Kneading Trap: Unlike yeast breads that require extensive kneading to develop a strong gluten network for chewiness, biscuits thrive on tenderness. Over-kneading develops too much gluten, creating a tough, dense crumb that resists rising. The goal for biscuits is a delicate structure, not a stretchy one.
- The Lesson Learned: The secret to truly tender biscuits lies in respecting the dough. Handle it as little as possible, and with the utmost gentleness. Your hands should be cold, and your movements swift and efficient. This minimal handling ensures that the gluten stays relaxed, allowing the biscuits to achieve their characteristic airy texture.
The Golden Rule: Embrace the Fold for Layers of Lightness
Once you’ve grasped the concept of minimal handling, the next revelation often comes in the form of a simple technique: folding. Forget laborious kneading or intricate laminating; the magic of those distinct, buttery layers comes from a surprisingly straightforward process. This method not only saves time but also guarantees an unparalleled texture.
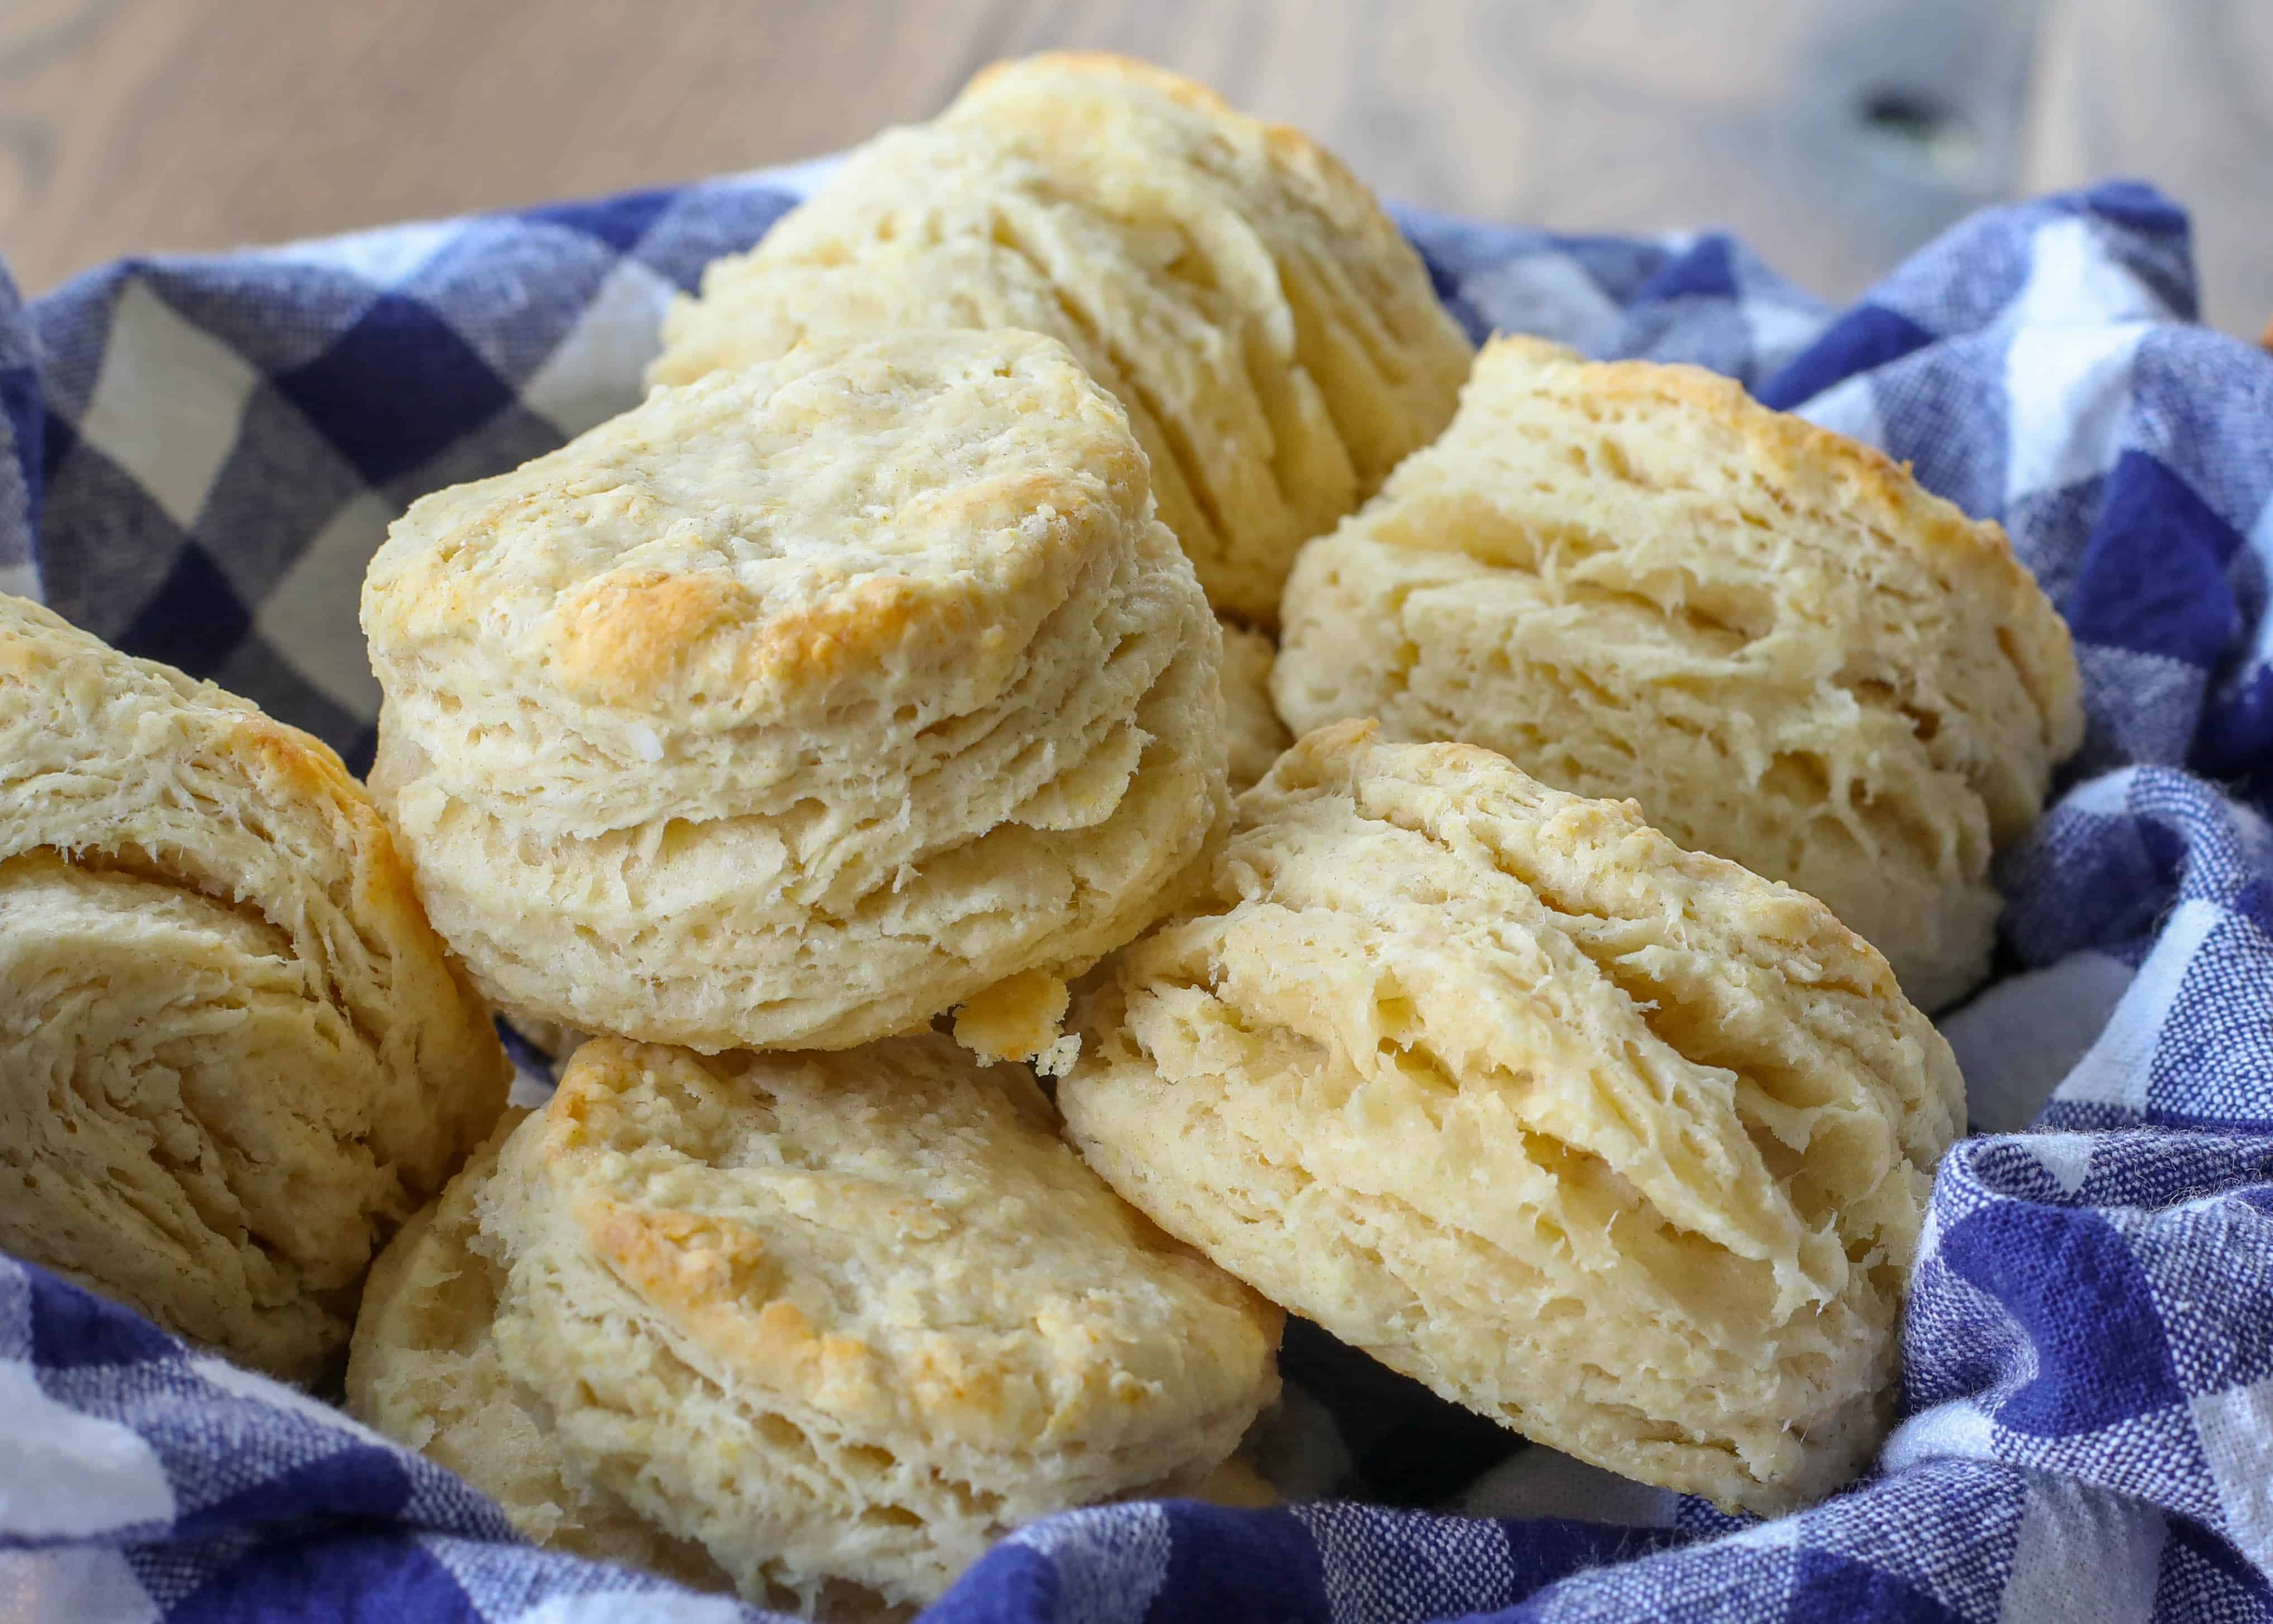
Instead of beating the dough into submission, you gently bring it together until it barely holds, then fold it over on itself multiple times. Each fold creates a new layer, trapping tiny pockets of butter and air. As the biscuits bake, the moisture in these butter pockets turns to steam, pushing the layers apart and creating that desirable flakiness and lift.
- The Simple Technique: Start by lightly gathering your shaggy dough. Pat it into a rough rectangle, then fold one-third of the dough over the middle, and the remaining third over that, like folding a letter. Rotate the dough 90 degrees and repeat this process 3-4 times. This builds layers without developing gluten. The key is gentle pressure, never stretching or tearing.
- Benefits: This method is incredibly efficient, requiring only about ten minutes of hands-on effort. It transforms a potentially dense dough into one that will yield effortlessly light and fluffy reliable biscuits, complete with all those pretty, buttery layers.
For a visual and step-by-step breakdown of this transformative method, don't miss our detailed guide on this technique: Unlock Fluffy Biscuits: The Simple Fold Method for Perfect Layers.
Essential Ingredients for Your Best Biscuits Yet
While technique is paramount, the quality and temperature of your ingredients play an equally vital role in achieving biscuit nirvana. Each component has a specific job in contributing to the final taste and texture.
The Power of Cold Butter
This is arguably the most crucial ingredient for flaky biscuits. Forget room-temperature butter; your butter must be ice-cold, straight from the fridge, and ideally even frozen for a few minutes before use. Grate it or cut it into tiny pea-sized pieces.
- Why cold butter is non-negotiable for flakiness: As the cold butter melts in the hot oven, it releases steam. This steam creates air pockets between the layers of dough, resulting in that signature flaky texture. If the butter is too warm, it melts into the flour prematurely, leading to a dense, cake-like biscuit instead of a flaky one.
- Butter vs. Shortening: While some traditional recipes call for shortening, which can create a very tender crumb, real butter offers an unbeatable richness and depth of flavor. The butter flavor in truly exceptional biscuits comes through beautifully, enhancing every bite.
The Right Flour Matters
The type of flour you choose can significantly impact the tenderness of your biscuits.
- Low-protein flour for tenderness: Southern-style biscuits traditionally use a soft wheat flour, which has a lower protein content than all-purpose flour. This naturally results in a more tender biscuit. If you can find a dedicated "biscuit flour" or "soft wheat flour," use it. Otherwise, a good quality all-purpose flour works, but handle it even more gently.
- Self-rising vs. all-purpose with leavening: Many bakers prefer self-rising flour for convenience, as it already contains baking powder and salt. If using all-purpose flour, you'll need to add your own leavening (baking powder and often baking soda) and salt in the correct proportions.
Buttermilk: The Southern Secret
Buttermilk isn't just for flavor; it's a functional ingredient that contributes to both the texture and the characteristic tang of truly delicious biscuits.
- Its role in activating leavening and adding tang: The acidity in buttermilk reacts with baking soda (and sometimes baking powder, depending on the type) to create carbon dioxide gas, which helps the biscuits rise. This reaction also contributes to the tender crumb. Beyond its leavening power, buttermilk adds a subtle tang that balances the richness of the butter.
- DIY buttermilk substitute: No buttermilk on hand? You can easily make a substitute by adding one tablespoon of lemon juice or white vinegar to a cup of regular milk. Let it sit for 5-10 minutes until it curdles slightly, then proceed with your recipe.
Mastering the Cut: A Straight Path to Sky-High Biscuits
Even with perfect dough, a faulty cutting technique can sabotage your efforts. The way you cut your biscuits directly affects how high they rise in the oven.
- Straight Down, Straight Up: The golden rule for using a biscuit cutter is to press it straight down into the dough with firm, even pressure, and then pull it straight back up. Avoid twisting the cutter at all costs.
- The Twist Trap: Twisting the cutter seals the edges of the biscuit dough. These sealed edges prevent the layers from separating and rising freely, resulting in shorter, denser biscuits. Think of it like a glued-shut book – the pages can't expand.
- The Thumbprint Trick: If your biscuits are rising so tall they're starting to lean or topple over in the oven, a clever trick is to press a light thumbprint into the center of each biscuit before baking. This tiny indentation provides a central point of stability, encouraging a more even rise and preventing them from falling over.
Beyond the Dough: Baking for Ultimate Fluffiness
The final stage, baking, is where all your careful preparation comes to fruition. The right oven conditions ensure maximum rise and a beautiful golden finish for your light and fluffy reliable biscuits.
- Oven Temperature: Biscuits love a hot oven, typically between 400°F and 450°F (200°C-230°C). The initial blast of high heat helps the butter melt quickly, creating that burst of steam that lifts the layers, and sets the structure before the butter completely melts out.
- Proximity Matters: Arrange your cut biscuits on a baking sheet so that their sides are just barely touching, or very close together. This creates a "community bake" effect, where the biscuits support each other as they rise, encouraging them to climb higher and maintain their shape.
- The Golden Top: For an irresistible golden-brown top and an extra boost of flavor, brush the tops of your biscuits with a little melted butter, milk, or a mixture of egg wash before baking. This also contributes to a slightly crisper crust.
For those times when you crave quick, delicious results without sacrificing quality, check out our 10-minute recipe that promises buttery, fluffy goodness: Buttery & Fluffy Biscuits: The 10-Minute Recipe for Tender Layers.
Conclusion
From the initial mistake of treating biscuit dough like bread to discovering the simple elegance of the fold method and the precision of a straight cut, the journey to mastering light and fluffy reliable biscuits is an incredibly rewarding one. With cold butter, gentle handling, and a hot oven, you can leave the "hockey puck" days far behind. Whether slathered with butter and jam, soaking up gravy, or accompanying a hearty meal, perfect homemade biscuits are a culinary triumph that's well within your reach. Embrace these techniques, and prepare to enjoy batch after batch of tender, flaky perfection.
